Thursday, December 19, 2013

Santa's Theatre is Now Open!

Lesson planning is difficult when you are trying to think of ways to both educate and entertain a large group of fussy first graders. They're still trying to grasp basic concepts, learning how to communicate, and decipher words on paper. They even struggle to read their own writing! Which makes writing assignments extremely difficult and time consuming. A mixture of poor teaching skills by their day-school teacher and no pressure at home to practice reading and writing makes for some bad news for these little guys. They are so behind in their reading and writing skills that I have to do something to get them excited about writing and story telling. I mean, they ALWAYS want to tell me stories...So why not give them their very own theatre!


For the theatre lesson, I taught the kids about story elements (character, setting, problem, solution). They are then to create their own Story map in prep for their very own story telling assignment that will end in them telling their story via puppet show. After creating their story map, the students must write 4 sentence about what happens in their story. The kids, so far, have done alright. They still struggle with a lot of spelling, grammar, and coherency...buuuut I'm getting them to write and think about how their story progresses. So, that makes me happy. 

For this task I used a large cardboard box, made a few cut outs and added some color. Thus became Santa's Theatre. I'm excited to see their reactions to their theatre. I'm hoping the kids will be more excited about writing!

...From what I hear, there will be some ninja elves. hehe

updates: The kids LOOOOOOVED their little theatre! :)

Tuesday, June 25, 2013

Repurpose Your Purpose


Long time no post, right!?

First off, I apologize that I haven't kept constant on my posts. I've been out and about creating new stories and finding inspiration, because lately I've had creator's block. Yes, that's the equivalent of writer's block. Now that I've found inspiration, I'm excited to share.

So let me just inform you on the whole repurpose concept. Take an old shirt or something you find at a thrift shop and make it into something more YOU...Cut it up, tie it up, sew it up. I've become quite familiar with my mom's old sewing machine :3 I've taken my dad's old work shirts and made an apron, an patriotic dress-shirt, took large t-shirts and made them into grocery tote bags. Today I bring you a a men's tank that I got at a thrift store and a shirt I had taken apart before and cleaned up the rough cutting.

Men's Large Tank -->split back women's tank shirt

front view

side view

back view

So yeah, there's the split back shirt. I saw these shirts on pinterest and thought they were so cute.  So I looked up a few d.i.y. ideas. Unfortunately, I came up empty on any 'how to' tutorials. :( So I just guesstimated on how one would go about creating the split back style. Cut the tank right down the middle (backside) and sewed it back up like a racer back, only sewing it closed a quarter of the way down. I'm satisfied with the way it came out. Now compare this $7 repurposed tank to what you find on the net/stores. Yeah, I'm a beast!  


 Blouse --> halter-racer back
front

back (w/bow)

So I took a blouse I had hidden among shirts I never wear and decided to tear it up.  Sorry I don't have a picture of what it looked like before.  So I took apart the sleeves completely. I didn't like the sleeves, they had that slight poof to the shoulders. Kind of like the sleeve below:


Yeah, the style can be very feminine and cute, but I had far outgrown the shirt, but I really like the nautical-like feel the blouse had and didn't want to part from it. So I changed it up. I looked up ideas on Pinterest (a great site for d.i.y. ideas) and found a few no sew repurposed shirt ideas.  First I had two straps going down the back that met at the bottom center- knotted at various points.  However, that looked too messy and bulky. So I took away all the tie-knots and sewed up pieces to make it look more clean. Cleaned up the arm area cut outs and added a bow at the bottom. Vuola!

Altogether both shirts took only a few hours in a day to complete. The tank to split back was really quick. I think it took me like 2 hours max to get it cut, pinned, fitted, and sewn. The blouse to halter took longer because I had to fix previous errors from my last repurpose and then figure out how to make it work using the materials I had left. If you have a sewing machine I highly recommend getting to know how to use it. You'll save yourself lots of money by finding bargain pieces and taking old clothes and making them awesome again! Also, sewing is a great skill to have.

Ok, before I end this post I have a question for my viewers. I have this small boys black t-shirt. Anyone have any suggestions/ideas of what I should do with it? I'd like to hear your thoughts :)


F.Y.I. you can buy any woman's Large/X-large blouse and make a dress out of it by adding a belt :) Just make sure it's the right length.
CIAO <3 <3


Sunday, April 28, 2013

Aye Aye Captain!

So I was doing an activity with my kids (the ones I tutor) that involved a boat, a crew, and some really silly instructions. Swab the deck! Ships Ahoy! Draw the Anchor! and many more as the kids quickly followed in the Simon Says-like activity. Twas pretty fun for both the kids and I. Aye, but that's not why we are here right!?

Not to say that the little sidebar there isn't relative to the sketch. Another sleepless night I spent thinking of things I might do other than ol computer and drain (<-getting sucked into a computer screen until I pass out...zzz) So I picked up my sketch pad and sketched away. Well...sort of.

A day prior I had gone through my art bin, the one with all my art papers, mags, and landscape notes. Did a little spring cleaning and it got me into the ol creativity mode again. Grabbed my huge sketch pad (I have 3-4 different sizes..this one is like 11"x 14" I think. Scanned through unfinished sketches or ones I could build on. Found my page of bird sketches and went at it. Vuola! I've been kind of lagging the upload time. I hesitate because I still don't feel it's quite finished. So check back for updates. I want to give this guy some color.

11"x14" sketch pencil/pen on sketch paper

Meet Plink! My little scissor-tailed flycatcher inspired friend. I saw an image of bird with a long, beautiful tail and thought it was the coolest thing! Looked up some more google images of "birds with long tails." The Quetzal is another bird with a similar anatomy. Just an F.Y.I. The flycatcher uses it's long, wispy tail in it's aerobatic stunts catching its food. These must be the most graceful hunters to watch. So I drew a sketch of a bird with a long beautiful tail. :)

I played around with beak styles. Going from long and curved (like that of a hummingbird) to very stumpy and sharp. I finally compromised with a little of both. I originally wanted to mirror the tail in the head feathers, but took on a Hermes helmet approach instead. The double winged headpiece kind of deal. It has a military feel to it as well. I was trying to make the bird more mechanical in its features to have more of a SteamPunk-ish feel. I also looked some images up of SteamPunk air-pirate costumes so as to incorporate something into my drawing. Maybe it shows...maybe it doesn't.

As for the wings...I couldn't decide how to design them. Like I said, I wanted a more mechanical feel for the bird. However, I was having difficulty deciding what I wanted. I ended up with bat-like wings. I suppose it works. The wings still need work as far as mechanical details (how the wing is supposed to extend out and other logistics). Looks like I need to study some Ornithology. So I best get started!

Aye Mate, until our next embarking!


Thursday, April 11, 2013

Research & ReConfigure


This is a model of the Landscape Architecture building for my LDA model making class. I failed to take any pictures of the front and sides before I took it apart. I had a lot of fun constructing the model and doing the research. Unfortunately, the fun ended when presentation time came and the teacher began to critique. She was one hard ball. I guess you have to be when you're in a male dominated career that is HIGHLY competitive in itself.

Some cool notes about this project:

-Researching the different bike racks was mind-blowing. The one I used here was the coolest and most efficient for the small space in between the building's two longer sides. The building in the middle is some kind of test lab..for what? I do not know. I think plants maybe. The Geology department and I think another department shares the building. Next store is the Plants Sciences building..I don't know. Bad department situating planning?

-I found some really interesting porch swings and waterfall-like porch covers. One inspired by Frank Lloyd Wright himself. Seriously...ARCHITECTURE IS WAAAAY COOL! Maybe I should have posted this in my other blog..merps. Ohswells! :)

-I spent a lot of time designing what I thought were pretty awesome planters. F.Y.I. professor didn't like my ideas or project all that much. gah! Talk about heart breaking. I guess my awesome research didn't quite show that well through my model. Though she kept telling us "abstract! abstract!" In my head that translates as "glarbitty gloobin, glarbitty gloobin"...in otherwords, I dun know whatcha talkin bout sista!
Momentary digression...
So like I said, spent lots of time coming up with cool ideas for the planter and being proud of what I had thought up. Good times, good times. :)

Yeah, so I don't have much to comment on this project. I promise I'll update with something more interesting on my next post. I'm slowly recovering my artistic tendencies. I've spent too long away from my pencil and pad :(

Monday, March 18, 2013

Gimme Some Ocean Breeze

Hey Blogosphere,
  Sorry I've been missing lately. I've had to endure two very long, busy, and hectic weeks. Between waiting aimlessly for Jury Duty and slow days at the gallery and school. However, I have been working on some new stuff.

The weather has been decent, when mother nature isn't driving my sinuses up the wall. Anywho, with the cool weather I've been really yearning some ocean breeze. Well, the ocean in general. I've got my sailor's cap on and my ship ready to sail!

Now let's check out some of the ocean's magnificent creatures!


Captain Starky

These guys aren't anything spectacular, but they were fun to draw. These sketches are really basic, but I do hope to give more character when I figure out what I want to do with them.  

Captain Starky is a mix of a little Steampunk flava flave! haha...I'm still working on my living studies. I think I live too much in my imagination to really be able to sit down and sketch mammals, fish, etc. Maybe I need to take a trip to the zoo? Anywho, here are some more drawings to look at as you scan my blog. Hopefully I have more coming this week. Maybe I'll get on another sculpture. 


Thursday, February 14, 2013

And A Lovely Galentines Day to You!

Happy Valentines day to all my viewers and a special Galentines Holla at these lovely ladies whom I have shared many an adventure with and love very dearly.


These gals (as seen in photo) have been such great friends to me through a lot of the ups and downs of this crazy world. Even miles away we still hangout via Googs + and occasional trips Northward or Southward :). 

Sorry ladies if this is publicly embarrassing, but you must know how amazeballs y'all are, especially for being so awesome and visiting for a Galentines Reunion! Anyways, I'll tone down the sappy. I know how some people get about mushy stuffs lol. I tried to find recent picks of all three of you ladies, and I found this one most suitable...Since it is a perfect reflection of the start of our friendship-as we all met at the Old Cabin. 

So Just wanted to say, Thank you ladies for your friendship!


OK, Now what many viewers/followers have been waiting for...(drum rolls)..........

TA-DA!!
"My Love Runs Deep..."
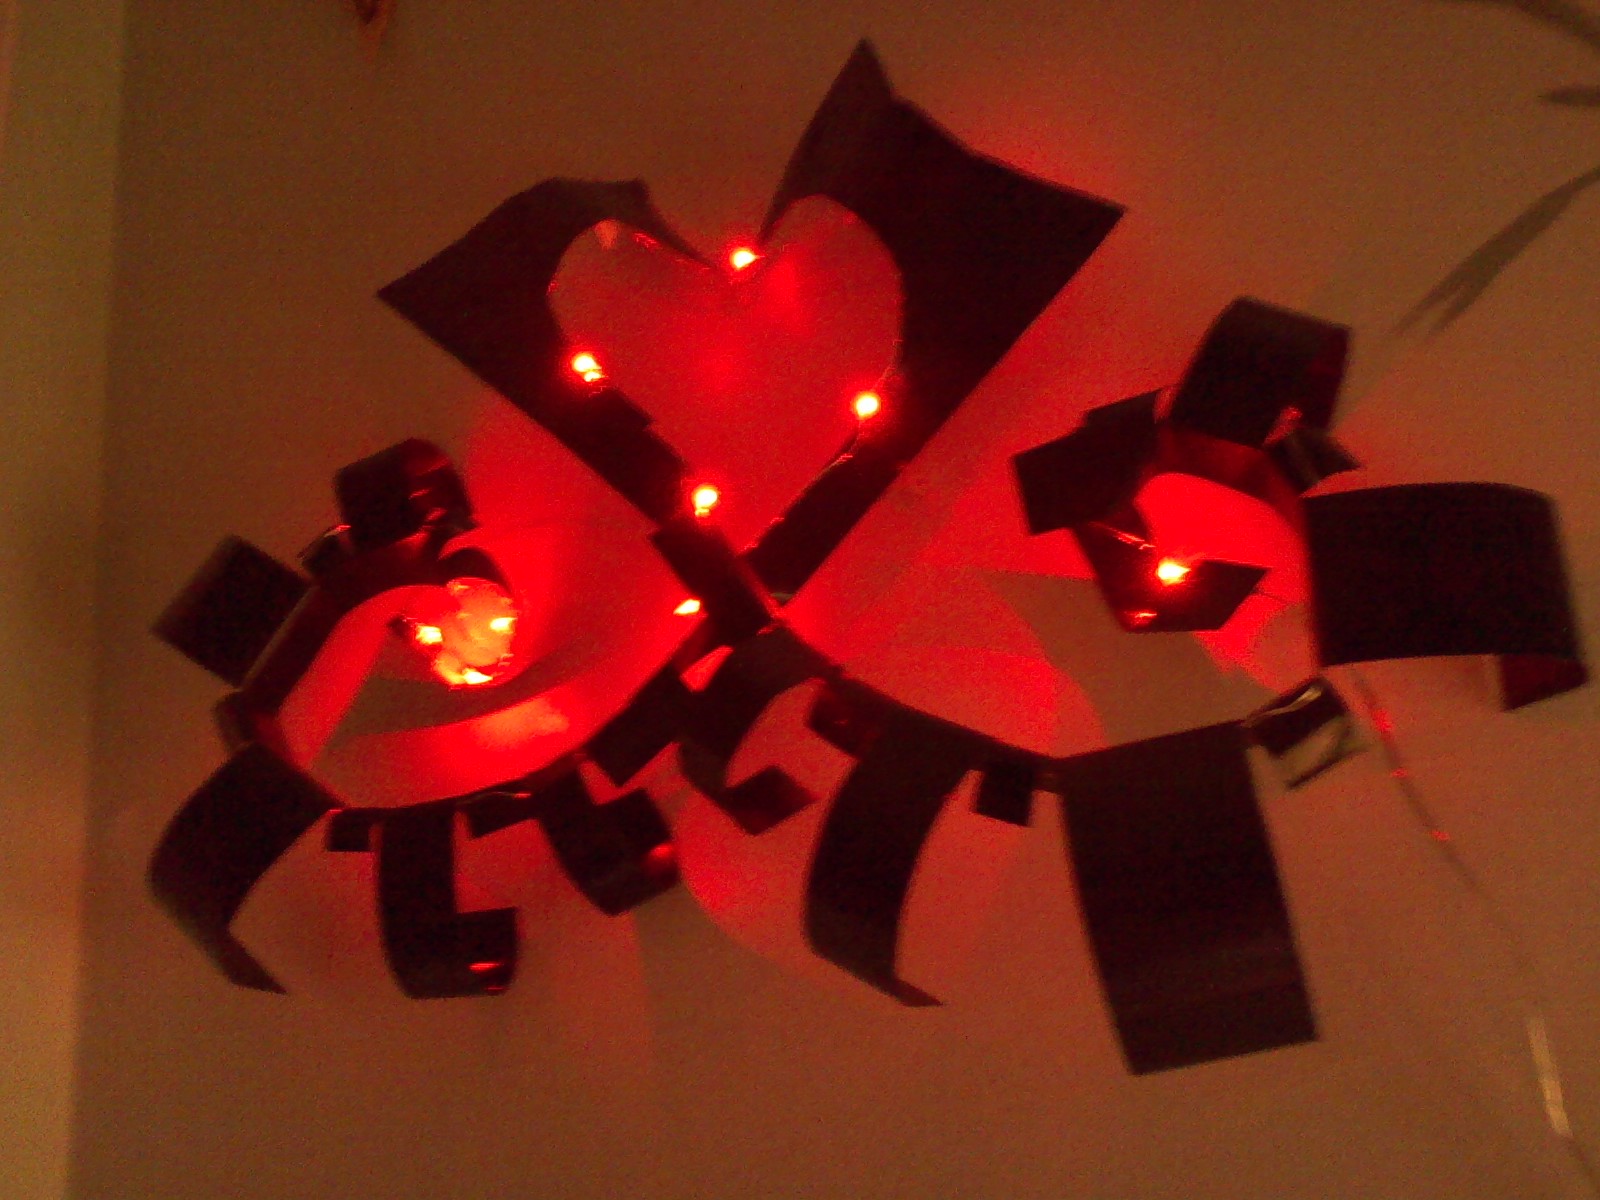
2'W x 1' 1/2" H: sheet metal, LED lights (lights off)

2'W x 1' 1/2" H: sheet metal, LED lights (lights on/angled)

2'W x 1' 1/2" H: sheet metal, LED lights (lights on/forward)
"My Love Runs Deep..." as I've titled my sculpture piece is a piece I would have liked to have entered in an art gallery open exhibit. Sadly, I was unable to finish it in time for registration. :( But I'm not all too bummed out, because I had lots of fun getting back into the swing of sculpture! Besides I'm still able to share it with all of you.

So I added three different images of the same sculpture. One with lights off as to give full effect of the red LED lights reflecting off the black of the sheet metal. For the most part it is done..I just need a few minor adjustments and some tine fin-tachments ;P....The next two images following the first are with the lights on and angled. I took an angled picture otherwise the viewer cannot really see the shape of the heart made by the two conjoining pieces.

Why did I name my piece as I did? Great question!
Let me first explain how I came to design my piece. With Valentines coming up I wanted to do something in relation to love. If you have not figured it by now, the two pieces are representative of two fish joining their tails together to form a heart. I took a sketch I had (image B) from my notes back in College...as I did (and still do) doodle. I love the arching of the fish and spherical forms in general. You can see in (A.) to the left is a slight sight of another fish facing the opposite direction. I played around with the idea of placing the fish emblem together. That's how I ended up at (B.).
B. sketches to Design
I decided to play with the emblem a little more, adding some darker parts and finally some color. The darker areas ended up being the parts of the sheet metal and the glowing red areas are where I cut and left open. So, basically took one of my random sketches and designed a sculpture piece from it. Pretty cool eh!

Alright, so back to the main question..how did I come to name it such? I was trying to come up with a few crafty names for this piece, but couldn't find any. So I looked hard at my drawing and thought..'well, there are red lights running through the body like blood or veins (looking at the sculpture itself the wiring and lights add a vein like effect on the backside) and these two pieces are living creatures that like all living things are just searching for a soul mate or another to form a bond with.' I kept thinking 'blood' & 'inner soul searching'...So I finally came up with "My Love Runs Deep..." as in blood(love, life) runs deep through ones body. And when you find your soul mate you share that love with them and give life. Also, you can think of fish as creatures of the deep sea, searching a vast ocean for some signs of life & a place in which it can only exist (water). So the title kind of takes that sense of "deep(er)" than physical love and plays with that idea. The ellipsis at the end is to give the viewer the freedom to finish and interpret the piece as they wish-perhaps have a more poetic take on it. Any how, I leave it up to the viewer to make something of this.

Hope you enjoy my piece. I'm really glad I have others to share my love with. :)

<3 Amore ti <3


Thursday, February 7, 2013

Dr. Horrible, We Have a Pulse...

Hello my dearest viewer(s),

Hope your week has been better than mine, because tutoring a group of first graders has me pulling my hair most days. If my job were made into a sing-a-long, most of it would include a broken ominous soundtrack...ok, so I'm exaggerating a bit much. I swear, sometimes these kids make me want to crawl into fetal position and rock myself back to sanity. But enough of my wonderful adventures with Dr. Horrible and his minions. Let's solve some of those mysterious shapes from our last post...

1) A turtle 2) my attempt at a bulbasaur 3) boat 4) fish 5) giraffe 6) camera 7) coyote 8) badger? 9) Seahorse 10) dragon

Alright, ya'll want to see some sculpture making, right!? Here it is!

Fig. A: Sheet metal cut, primed (4'Lx 2'H) 
Fig. B: Sheet metal shaped
Ooops! Forgot to tell you, these pictures are just a preview. :) Didn't think I would spoil your Valentine's Surprise, did you? That would be lame. 

So here are just a few pics of my progress I've made since taking a piece of sheet metal and going all Edward Scissor Hands on it (Fig. A). The two pieces cut out have been cut, softened the edges (so I don't accidentally stab myself when putting it together), and put two layers of primer on them suckas. Yes, metal needs to be primed before painting. The primer didn't leave the best of surface texture, but luckily I can always improvise :). 

The next step (Fig. B) is shaping the pieces the way I want to set them. Of course, this is just one piece. I was hesitant about showing a preview of my piece, but I don't think I'm giving anything away with these pictures. I mean, I still have to paint, put together, and add the lighting to ALL of it. Oh, yeah! I also need to add a few minor attachments. 


Fig. C: Shaped and lit (Lit work space)
Fig. D: Shaped & lit (unlit work space)
So there you have it- an almost completely pulsating piece of sculpture. Thought you may want to see what it looks like lit. Hopefully, once I get it painted and the lights properly placed along the entire sculpture the red light will be more reflective and apparent. 

 I'm wishing for some good weather this weekend so I can finish my piece, and research all the reasons why Valentines Day is a joke :)... Or maybe just watch Dr. Horrible's Sing Along Blog, and eat my Christmas chocolate rose, given to me last year by one of my students. Ha!

Tutto è lecito in amore e in guerra


Sunday, February 3, 2013

Puzzle Pieces

Buona notte fellow viewers,
 Are you ready for a sample of my Valentine's Day sculpture?

Well, sorry to say you still have to wait 11 more days... tee hee. I'm terrible, I know.

** For those just following (newcomers) you may want to check out my last post "My Bloody Valentine." It has some insight as to what's going on..as this is a follow-up to my last post.

For my daily viewer: Updates on the sculpture piece..It is coming along. Slowly. I received my lights for the piece last week. Yes, it will be lit. AND I have a majority of the cuts done. Just waiting on the primer to dry, need the shaping to take place, painting, and lighting.

For now I give you a few images. I had a bunch of small pieces left over so I thought I'd create something fun out of the pieces. Try to guess what each one is!!!

Here are all the pieces I had left over. And here are the puzzle pieces put together....

----------------------------------------------------------------------------------------------
1.


2.


3.


4.

5.

6.

7.

8.

9.

10.


Think you guessed them all right? I don't think they are too hard. A 6 year old should be able to guess these all right. Want to challenge your brain cells? What else can you make with these pieces? 

I'll share the answers in my next post :), and probably give a peek at the progress of my sculpture. So keep your eyes open!

Molto Amore <3 <3 <3 <3


Wednesday, January 30, 2013

↣ My Bloody Valentine ↢

Hey, Cupid flew by and left a message: He wants his bow and quiver of arrows back. Yeah, he's pretty upset that you just unleashed a rainstorm of arrows among an unsuspecting crowd.

Now, isn't St. Valentine's Day just lovely?!...No? Well, someone dodged the rainfall of cupid's arrows. I have to say. Valentines Day is a hit or miss kinda deal.

You've either been showered with the lovely affections of strangers, and loved ones to the point where you're flying as high as cupid
OR
You're lurking in the darkly shadows mumbling curses at the bumbling idiots who spend unnecessary amounts of money on Valentine's Gifts and romancing one another.

I may just be a bit more of the lurking in darkly shadows kind. I say that only because I've never had a Valentine. Yes, I admit to being a bit of a scrooge and grinch on a day designated for much loveliness. The day only brings memories of failed attempts to win my crushes over in Middle School and High School. :/....

However!!! This year, I shall come out of those darkly shadows and prance around like one of those bumbling idiots that couldn't find cover when cupid's arrows came crashing down among every Who-Ha in Who-Ville. YES, I SHALL BE CUPID'S SIDEKICK- SPREADING LOVELINESS TO THE CITIZENS OF THE WORLD!!!!....well, at least to my loyal and devoted followers and readers :)

Sorry, I got a little carried away with the comic book narrative there. Now on to the important stuff. I know that this is a pretty text heavy post, but I just wanted to create a monologue-dialogue with my viewers. Monologue-with me talking incessantly & dialogue- Hoping that my audience gives some feed back on their thoughts about St. Valentines Day. Are you a scrooge or a sucker for all things lovely?

Also, I am currently working on a sculpture, dedicated to all my viewers here! :) I wanted to enter my sculpture in the dA Center for the Arts 'Simply Red' Show (https://www.facebook.com/events/451115978275884/?fref=ts). Unfortunately, my busy schedule and this cold weather, that's been making random trips, has slowed progress. So, I decided to do my own Valentine's day project. I'm hoping  it comes out the way I envisioned it. SUPER EXCITED and will be working on it this weekend. Hoping that the weather is a lot nicer, seeing that my workspace is in the garage (which can get pretty cold). So I haven't done any sculpture pieces since my Junior year in college. Let's hope I still have the magic :)

So tempted to give previews...BUT I don't want to ruin the surprise. So here is a picture of a lovely cat meanwhile <3
(Sorry Erik, Pom Pom is MY Valentine)

Until V-Day,
Molto Amore!


Friday, January 25, 2013

Still Life is Real Life

             11"x15" Watercolor                   5"x6" Watercolor & digital edit

How about some flower power for this rainy hour! There is something soothing and refreshing about the sound of rainfall, the wet grass, and the silence that the rain brings as every living creature heads for shelter and cuddles closely. Yes, even us humans take part in the "head for shelter and huddle around each other for warmth." If this isn't you then you're probably the part of the group that runs outside to splash in the puddles and catch the rain drops on your tongue. Then there are the few that may be reading this, grumbling at the mention of rain. To those few I say..A HUMBUG!

Now on to the paintings, which require WATER. :) The first painting at the upper left hand corner was done in my High School art class. I still remember my art teacher's name, Christina. She was pretty awesome. She really liked me, probably because I was one of the few students who took the class to learn and actually made effort. Seriously, it irritates me when students take art courses thinking that it's going to be a breeze and that art is not doing any 'real' work. Well, you know what!? Art does take a lot of thought, design, and effort. I've taken enough art courses, and done plenty of art projects myself to know that it is a lot of actual work. There is strategy, design, math, engineering...Just want to make that point for those doubting the talent of artists. Of course, I am not defending those sham artists, which are probably those kids who grew up taking art courses to pass an easy A.

Now as I was saying, the top left corner watercolor painting was done in my art class in H.S. Actually, both of the above images were painted in H.S. Both were also painted from an image. This was my first successful use of watercolor. The teacher was also thoroughly impressed as she persuaded me to enter the County Fair Art Exhibit and even sell my my painting. SELL IT! ...she believed my painting was worth something in dolla dolla bills y'all. That seriously gave me an ego boost :) I still have the painting till this day. It's a constant reminder that I am capable of doing more than I know. I could have sold it yes, but it has the sentimental value of your first dollar bill on the opening of a new business. So it hangs on my wall wherever I go.

Now, the smaller painting on the right upper corner is just a quick paint of a flower on an image. It really is a small painting that took the first page of my first sketch book. I really liked using orange/yellow/purple together. Light colors contrasted among the deeper purple color looks attractive. That is why one day I plan to create a flower bed of lavender and yellow/orange flowers. Oh, the smells and sight!

Onto our next two. The bottom left painting was done at home in So Cal, taking a few flowers from around the house (roses) and placing them in a small saki cup lying around the house. note: I painted both paintings from real life not an image. I used a different type of paper (drawing paper) rather than watercolor or sketch paper, so the colors are a more muted and the painting looks more wrinkled...rrrr rough. The painting to the right was done while on a stroll through the UC Davis Arboretum. If anyone ever visits the school, do make sure you take a stroll through THE WHOLE arboretum. At the eastern end there is a gazebo, a garden, natural art, a mosaic bathroom, and large areas of open grass to soak up the sun, play a game of frisbee or have a picnic. The arboretum is my favorite place in Davis. FAVORITE. haha. Any way, the right painting consists of a few flowers from the Arboretum garden. The colors are a lot more vibrant than shown here. You can tell the difference from the painting left. The dark frame surrounding the painting gives the painting a more shadowed look. I really loved the soft pink and white against the darker pink flower and brown background. Again, dark vs. light. The best part of these two paintings was sitting outside among nature and contently painting in beautiful weather.

Maybe when the weather is less rainy and I am not busy writing lesson plans and gallery data entering I can start up on some new material for my blog. I could really use a nature retreat outside of home. Sounds like an adventure!


               9"x11" Watercolor                                  9"x11" watercolor


<3 Arrivederci!

Monday, January 21, 2013

Bare Minimum

8"x 11" prismacolor marker w/pen

Hrm...what can I say about this drawing other than it is totally awesome and a nice intro back into the habit of drawing. This was for an internship project at the Design Museum. This was actually my first proposal, but it got turned down because it was too 'out there'...bleh...design students *shrug.

The curator and director of the museum wanted something more simple. It had to be more word based than image based. Psh! Fine, I'll save this drawing for someone with taste. Sorry, bitter resentment coming out. I feel like my drawings are always "too cartoony" "too out there" "too this" "too that"...I get it...be more boring! :/..Maybe I should just start pitching my images to gamers and children's book illustrators. *and end*

For this image, I was going for a bionic bird/dragon of some sort. I found this image of a mechanical, evil-looking bird and configured it to my own taste. The drawing I took influence from had an intricate extended head reaching left (where the head is) and a slightly different wing structure. The body is probably the only portion that is similar to that of the influenced image. 

Other than that, not much to say about this guy. He was just a creation of complete EVILE!!!!muahahahahaha.  

% Under the Cover of Night %

 9"x 11" Charcoal on drawing paper
6"x 8" prismacolor pencil w/ chalk pastels & pen

Decided to make this post Owl Themed. Here is an abstract and representational drawing of owls. As one may have concluded from past drawings...I'm a fan of the feathered friend. They are truly beautiful creatures. My favorite of the birds is the pygmy owl. It's so adorable. I would insert an image, but this isn't a "post cute bird photos" blog. ;P 

A little about each, I suppose I could start with the top one first. I was going through a phase of sleepless nights and late nights make me think of all the things that come alive at night. The owl being the most popular creature of the night, I decided to attempt at a representational drawing of an owl. Of course, I was not going to wait outside in the cold for some magical owl to drop by and pose for me for a few hours. Although I have spotted and heard one on the occasional night. Maybe it's Harry Potter's? eh eh? Yeah, not much of a Harry Potter fan. Sorry, but my loyalty lies with Lion Witch and the Wardrobe and Game of Thrones. But I digress.

So, one night I researched some owl photos (body, wings, etc.), picked up my pencil (in this case charcoal) and started making magic happen. I'm actually quite proud of how this lit'r fell'r turned out. Did not do any erasing, other than to create the feather texture and patterning. 

Now, the abstract drawing of an owl came from a doodle I found in one of my notebooks from school. I believe I was initially trying to draw a swan/dragon of some sort. I think this drawing took place during my sleepless night phase. I tell you, birds of a feather flock together :) I mean, my mind is always soaring and try to dance as gracefully as a swan when no one is looking...ok, maybe I've shared too much. 

After turning my sketch into an abstract image I added some color. I really like working with the greens and yellows and wanted to practice blending and mixing the different shades and tones. So that explains my color choices. I added the white highlights to sort of embellish different sides facing toward a "light source." I still need work on the lighting aspect, but I think I can slide if I push the abstract concept :). 

In conclusion, owls are beautiful, and may just be my animal spirit. 

Midnight Encounters

6"x4" foam board cut out w/trace paper backing, prismacolor marker

Hrm...haven't posted anything for a while...Suppose my nearly non-existent audience deserves a few new posts for a new year.

I made this for my mom's birthday. My mom is a difficult lady to find a gift for..not to mention having to send whatever I got her via mail would probably be pricey. Being hundreds of miles North and with little to no budget (yeah, college!) I opted for a more affordable gift idea.

Now, who doesn't love homemade gifts, made with love, sweat, and tears...Hey, don't judge. Gift making can get emotional when you're running out of time, ideas, and patience..lol. Luckily, I took my mom's interest in wolves and put it into a light weight card.

Of course, this was going to take a little bit of research. First, I needed an image of a wolf in some kind of pose to draw from. I found an image of a wolf howling and used it as help to create my scene. Did the same with the landscape. I found a few images of a desert and meshed ideas. The research and drawing was the easy part. Carving the image out was more difficult, because I wanted that crisp cut. Yes, I used an exacto knife. However, This foam board was giving me some difficulty. Especially when it came to cutting out the cactus. Hrm...I suppose the fuzzy edges add character :).

Cut and pasted the trace paper onto the back, added some color and blending AND vuola, Magnifico! Packed it, sent it (with a b-day card), stamped it and off it went.

She called me a few days later to tell me she got it and loved it. Of course, she may have just said that she loved it because she's my mom and loves me ;p.